When a fire starts with a hidden spark, you quickly learn that safety comes before fire cleanup. You’ll shut off power, inspect wiring and panels, and document every affected area before removing debris or soot. Proper containment, HEPA filtration, and odor control matter because residue can linger in walls and air. The next steps determine whether you restore the space correctly—or miss damage that keeps growing.
Key Takeaways
- Ensure the site is safe, utilities are off, and pets and children are kept away before any cleanup begins.
- Photograph all fire, soot, scorch, and water damage before moving debris or cleaning surfaces.
- Contact your insurer and a licensed electrician to inspect wiring, panels, outlets, and hidden heat damage.
- Remove debris safely with gloves and eye protection, using HEPA vacuuming or damp methods instead of dry sweeping.
- Use professional smoke remediation for visible soot or odor, since contamination can spread into walls, vents, and finishes.
What to Do After an Electrical Fire
After an electrical fire, you should first make sure the area is safe to enter and confirm that utilities remain shut off if damage is present.
Then document visible damage with photos and notes for insurance and repair planning.
Next, contact your insurer and a licensed electrician so you can begin coordinated fire cleanup after electrical fire incidents with a clear record.
Remove only undamaged valuables and keep them separated from soot-exposed items.
Open windows only if conditions are stable and authorized.
If smoke residue has settled, avoid wiping surfaces until you know the proper cleaning sequence.
Save receipts for emergency services, temporary housing, and protective supplies.
Stay organized, stay connected with your support team, and keep each decision methodical so recovery moves forward with less stress and fewer mistakes.
Make the Area Safe Before Cleanup
Before any fire cleanup begins, you need to secure the site and confirm it’s safe to enter. Keep everyone out until you’ve checked for immediate hazards and controlled access. Wear protective gear, work with at least one other person, and move methodically through the space.
- Shut off power only if it’s safe to do so.
- Ventilate the area to reduce lingering smoke.
- Mark unstable zones and damaged surfaces.
- Remove pets, children, and unneeded items.
- Document visible conditions before disturbing debris.
You’re not doing this alone; careful prep protects your team and keeps cleanup organized.
When the site is stable, you can begin recovery with a clear, shared plan.
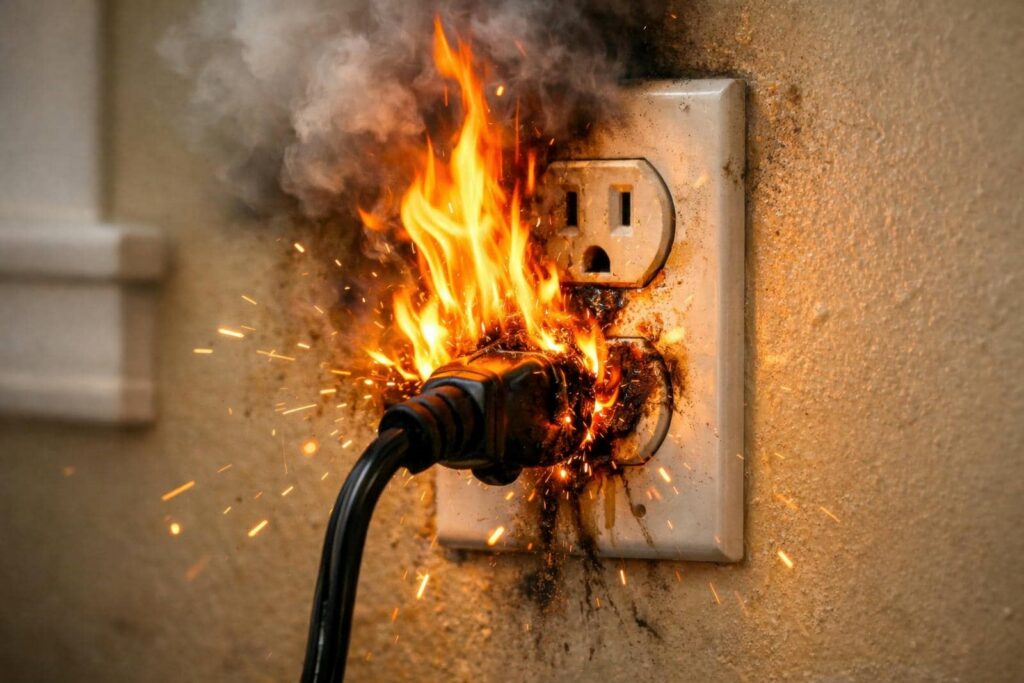
Inspect Wiring, Panels, and Outlets
Inspect wiring, panels, and outlets for heat damage, melting, discoloration, arcing, and loose connections, since electrical fire cleanup can reveal hidden faults that aren’t safe to ignore.
You should examine breaker handles, panel labels, and conduit entry points with a flashlight and insulated tools. If you see brittle insulation, warped metal, or a burnt odor, treat the circuit as compromised.
Tighten only visibly secure terminations; don’t energize anything until a licensed electrician verifies continuity, grounding, and breaker performance.
Check outlets for cracked housings, scorch marks, and loosened receptacles, because minor damage can hide deeper failure.
When you document each finding, you help your team stay aligned and make confident repair decisions together.
Remove Debris, Ash, and Damaged Items
You should sort debris into separate piles for salvageable materials, nonhazardous waste, and fire-damaged items that need disposal.
Remove ash with a HEPA vacuum or damp microfiber methods to limit particle spread, and avoid dry sweeping that can re-aerosolize contamination.
Then assess damaged materials for structural integrity, electrical exposure, and contamination before you decide what you can clean, repair, or discard.
Safe Debris Sorting
After the site is declared safe, sort debris methodically and remove loose ash, burned materials, and heat-damaged items from the affected area. You’ll work in clear zones, separating reusable materials from waste so your team stays organized and confident.
- Wear approved gloves and eye protection.
- Place sharp fragments in rigid containers.
- Bag lightweight debris before moving it.
- Tag suspect electrical components for review.
- Keep walkways open for safe access.
Handle each item once, then place it where it belongs. Inspect hidden voids, baseboards, and outlets for damaged pieces, but don’t force anything loose.
Maintain a steady pace, and communicate every change so everyone understands the cleanup plan. This method helps you reduce secondary damage, support later repair decisions, and keep the workspace controlled, efficient, and ready for the next recovery step.
Ash Removal Steps
Start by clearing loose ash. Then remove burned debris and damaged items in a controlled sequence so the work area stays manageable.
You should wear PPE, lightly mist dust-prone surfaces if conditions allow, and use HEPA-rated tools to limit particle spread.
Work from the top down and from clean zones toward heavily damaged areas so you don’t track residue back across the site.
Place ash and debris into lined containers or sealed bags as you go, and keep pathways open for safe movement.
Check for sharp fragments, exposed conductors, and unstable materials before each lift.
As you work, keep your team aligned on disposal points and staging areas. That shared discipline helps everyone stay safe, organized, and ready for the next cleanup step.
Salvage Damaged Materials
With the loose ash already controlled, remove burned debris and unsalvageable items in a deliberate sequence so the site stays safe and workable.
You should sort materials as you go, separating salvageable components from contaminated waste. Wear gloves, eye protection, and a respirator, and keep pathways clear for safe movement.
- Lift charred fragments into lined containers.
- Bag soot-covered insulation immediately.
- Isolate wet electrical materials for disposal.
- Tag reusable hardware before storage.
- Sweep fine residue after each section.
Work from the outer edge inward, checking framing, drywall, and fixtures for hidden damage.
If insulation, wiring, or structural parts show heat distortion, don’t reuse them. Document each removed item, then coordinate disposal with your cleanup team so everyone stays aligned and your recovery moves forward cleanly.
Clean Soot From Walls and Surfaces
Once the area is safe and dry, you can begin cleaning soot from walls and surfaces using methods that reduce smearing and prevent further damage.
Start by vacuuming loose residue with a HEPA attachment held just above the surface. Work from top to bottom, using dry chemical soot sponges in straight passes, and rotate to a clean face often.
For washable finishes, test a small area with mild detergent and warm water, then wipe lightly with microfiber cloths. Avoid over-wetting, which can drive soot into paint or drywall. Change cloths and sponges as they load up.
Wear gloves and a respirator, and keep each room organized so you and your helpers can work efficiently together.
Stop if paint lifts or the substrate feels fragile.
Control Odors and Improve Air Quality
After soot is removed, focus on lingering odors and airborne contaminants so the space can dry out cleanly and remain safe to occupy. You’ll help the room recover faster when you improve ventilation and remove odor sources methodically. Open windows if outdoor air is dry, run HEPA filtration, and keep the area uncluttered so airflow stays consistent.
Follow these steps:
- Replace saturated filters
- Run an air purifier with HEPA media
- Use exhaust fans to move stale air out
- Place activated carbon where odors concentrate
- Monitor humidity and keep it low
Avoid masking smells with fragrance; that only hides contamination. Instead, remove residues, circulate clean air, and inspect hidden voids where smoke can linger.
With steady attention, you and your household can feel secure again.
Plan Electrical Fire Repairs
Assess the damage in layers so you can plan repairs in the right order. You’ll want to separate structural, electrical, and surface issues before you start any rebuild work.
Check wiring runs, outlets, breaker panels, and junction boxes for heat stress, brittle insulation, or soot intrusion. Replace any compromised components; don’t patch damaged conductors.
Then inspect drywall, framing, insulation, and flooring for charring or hidden moisture from suppression efforts. Prioritize load-bearing areas and active circuits first, then move to finishes.
If you smell burnt residue or see discoloration, keep testing nearby materials. Work with a licensed electrician and qualified restoration crew so your team stays coordinated.
A clear sequence reduces rework, limits hazards, and helps your household get back to a safe, stable space.
Document Damage for Insurance
Before cleanup and repairs move too far, document every sign of fire damage for your insurance claim. You’ll build a clear record that supports your case and keeps your household aligned through the process. Use your phone, a notebook, and dated files.
Photograph every affected room from wide and close angles.
Capture soot, scorch marks, melted wiring, and water residue.
List damaged appliances, fixtures, and personal items.
Save receipts, model numbers, and warranty papers.
Record dates, times, and any conversations with your insurer.
Store copies in cloud storage and a secure folder. Keep each file labeled by room and item.
Precise documentation helps you answer adjuster questions quickly and strengthens your claim with consistent, verifiable evidence.
When to Call Electrical Fire Cleanup Pros
If you see visible smoke damage, you should call electrical fire cleanup pros to assess soot, residue, and structural impact.
If wiring looks charred, melted, or intermittently powered, don’t touch it or restore service yourself. A qualified team can isolate hazards, verify safety, and plan cleanup before further damage occurs.
Visible Smoke Damage
Visible smoke damage often means you should call electrical fire cleanup pros right away, because soot can spread beyond the burned area and settle into walls, ceilings, vents, and fixtures.
You’ll want a documented cleanup plan that isolates affected zones and protects your space.
- Inspect for soot film on surfaces
- Photograph damage before cleaning
- Seal off HVAC vents
- Remove loose debris carefully
- Verify odor reduction after treatment
This approach helps your home or business feel safe again, while reducing the chance that residue lingers in hidden areas.
Professionals use controlled methods to lift smoke particles, sanitize impacted materials, and confirm whether restoration can proceed.
If you see staining, haze, or persistent odor, don’t wait; prompt action keeps recovery organized and helps you rejoin normal routines with confidence.
Unsafe Electrical Wiring
Unsafe wiring after an electrical fire needs immediate attention, because damaged conductors, melted insulation, and overheated junctions can keep posing a fire risk even after flames are out.
You shouldn’t restore power or inspect hidden circuits without qualified help, since arc faults, compromised breakers, and carbonized wiring can fail again under load.
Call electrical fire cleanup pros when outlets feel warm, breakers trip repeatedly, or you smell burnt plastic near walls or panels.
They’ll isolate circuits, test continuity, remove damaged components, and document hazards for repair planning.
Working with trained specialists helps you protect your home and join a safer recovery process with confidence, clear next steps, and code-aware cleanup that reduces the chance of a secondary incident.
Frequently Asked Questions
How Long Does Electrical Fire Cleanup Usually Take?
You’ll usually need one to seven days, depending on damage, soot spread, and repairs. You can speed it up with prompt debris removal, detailed cleaning, and coordinated restoration planning, keeping your property safe and ready.
Can Smoke Damage Affect Nearby Rooms Without Visible Flames?
Yes—of course invisible smoke politely ignores walls and rooms, right? You’ll find it can spread soot, odor, and corrosive residue into nearby spaces, so you should inspect, ventilate, and clean adjacent rooms methodically too.
Should Belongings Be Professionally Cleaned or Discarded After a Fire?
You should professionally clean salvageable belongings, then discard items that are porous, heat-damaged, or heavily contaminated. You’ll reduce health risks, preserve valuables, and restore usable property faster when you document damage and follow restoration guidance.
How Do You Safely Handle Water-Damaged Electrical Equipment?
You handle water-damaged electrical equipment like a sealed compass: disconnect power, don’t energize it, and inspect for corrosion. You should document damage, dry components, and have a qualified technician test, repair, or discard each item.
Will My Home Need Temporary Power During Repairs?
Yes, you’ll likely need temporary power during repairs if circuits, panels, or wiring stay offline. You can use a generator or utility bypass, and your contractor should verify safe load distribution, grounding, and code compliance.
Conclusion
After an electrical fire, why risk hidden damage or lingering soot? You should shut off the power, verify wiring, panels, and outlets, and then remove debris and damaged items with proper protective gear. Next, clean soot from walls and surfaces, control odors, and improve air quality. Document everything for insurance, and plan repairs before re-energizing the system. When the damage is extensive, call electrical fire cleanup pros to ensure your space’s safe, thorough restoration.