Ceiling water damage often starts in the insulation or framing long before you see a stain. You need to stop the leak, check for sagging or mold, and dry the area fast with airflow and dehumidification. Then remove weakened material, repair the surface, and seal it before repainting. If you skip one step, hidden damage can spread quietly—and that’s where the real cost starts.
Key Takeaways
- Stop the leak, protect the room, and shut off power to affected circuits if safe.
- Inspect the ceiling for sagging, stains, soft spots, mold, or active drips.
- Dry the area quickly with fans, ventilation, dehumidifier, and clean towels.
- Remove damaged drywall or ceiling materials after checking structural safety.
- Repair with joint compound, primer, and matching paint, or call a professional for major damage.
Stop the Leak and Protect the Room
First, stop the water source if you can safely reach it, then protect the room from further damage. In these ceiling water damage restoration steps, you should shut off the valve, pause appliances, or call a plumber if the leak’s origin isn’t obvious.
Move furniture, electronics, and valuables out of the drip zone, then cover anything left with plastic sheeting. Place buckets or pans under active drips and line them with towels to reduce splash. If water is pooling on the floor, contain it with absorbent materials and keep foot traffic low.
Turn off electricity to affected circuits only if you can do so safely. Quick, coordinated action helps your space stay safer, limits spread, and keeps your next repair steps more manageable.
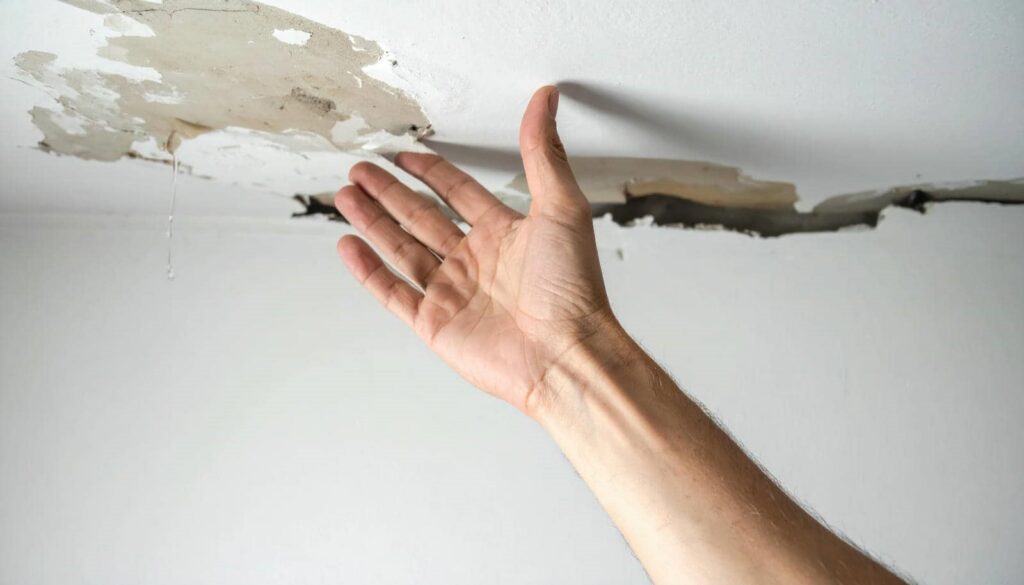
Look for Sagging, Stains, or Mold
Check the ceiling for sagging, discoloration, or mold as soon as the area is safe to inspect. You’re looking for signs that the material has absorbed water and lost strength. Use a bright light and inspect from several angles so you can spot subtle changes. Keep notes so your team can compare conditions later.
Press gently nearby and watch for soft spots or movement.
Mark any brown rings, yellow patches, or dark spotting.
Check corners, seams, and fixtures for fuzzy growth or odor.
If you see bulging, widening stains, or visible mold, treat the area as damaged and keep people out of that space. Your careful check helps everyone stay informed and ready for the next repair step.
Dry Ceiling Water Damage Quickly
Dry the ceiling fast to limit swelling, mold growth, and structural weakening. Turn off power to affected rooms, then ventilate the area with open windows and running fans. Aim airflow across, not directly into, the wet surface so you don’t spread moisture.
Use a dehumidifier to pull water from the air and keep indoor humidity below 60%. If you can safely reach the leak source, stop it first; otherwise, keep the area isolated and monitor conditions closely.
Blot visible damp spots on accessible trim or edges with clean towels. Check the ceiling every few hours for cooler, darker, or softer areas, since those signal trapped moisture.
When you act quickly and methodically, you give your home the best chance to recover cleanly.
Remove Damaged Ceiling Materials
You should first assess the ceiling for structural damage before you remove any materials.
Then you can cut out and remove all wet drywall so the damaged area doesn’t spread.
Keep the work controlled and document what you remove for the repair phase.
Assess Structural Damage
After the leak stops, inspect the ceiling framing and remove any damaged drywall, plaster, insulation, or other compromised materials.
You’re checking for sagging joists, split members, corrosion, and fastener pullout so your repair team can work safely and with confidence. Use a bright light and a probe to test wood or metal around the wet zone.
Look for dark staining, softness, or movement that signals structural stress.
- Trace the leak path.
- Identify weakened framing.
- Mark all affected sections.
If you find widespread distortion, stop and bring in a qualified professional.
Clean, stable framing helps your group stay on track and prevents hidden failure later. Remove only compromised material, then document what you see before the rebuild starts.
Remove Wet Drywall
Once you’ve confirmed the ceiling is stable enough to work on, cut out and remove all wet drywall, plaster, and other damaged ceiling materials.
Wear gloves, eye protection, and a mask before you start. Mark the cut lines at least 12 inches beyond visible staining, then use a utility knife or drywall saw to open the area cleanly.
Remove insulation, lath, and debris in small sections, and place everything in heavy-duty bags. As you expose framing, check for soft wood, rusted fasteners, and hidden moisture.
Keep the workspace contained so dust and fragments don’t spread through your home. If you’re working with a team, communicate clearly and maintain a steady pace.
Careful removal sets up the dry-out and repair steps that follow.
Repair the Ceiling Surface
You should assess the ceiling surface for soft spots, cracks, and any remaining water staining before you start repairs.
Next, patch drywall holes with joint compound or a replacement section, then sand the area smooth once it dries.
Finish by matching the ceiling texture so the repair blends with the surrounding surface.
Assess Surface Damage
Start by evaluating the ceiling surface for staining, sagging, soft spots, cracks, bubbling paint, and loosened drywall or plaster. You’ll want to map the damage before you touch anything.
Use a flashlight and a dry hand to feel for texture changes, and note where the surface gives under light pressure. This helps you and your crew stay aligned on what needs attention.
- Mark every affected area.
- Check whether the surface stays firm or flexes.
- Compare damaged sections with nearby dry material.
If you spot active moisture, stop and let the area dry further. Track the size, shape, and location of each defect so you can choose the right repair approach later.
Careful assessment keeps the restoration process organized and helps your space feel safe again.
Patch Drywall Holes
After you’ve mapped the damage, patch any drywall holes so the ceiling can be rebuilt cleanly. Cut back to solid material with a utility knife, then remove loose paper and crumbled gypsum.
If the opening is small, apply a drywall patch or mesh tape over a backing strip. For larger gaps, fit a new drywall piece to the opening and fasten it securely to framing or supports.
Use a setting-type compound to fill seams and fastener heads, pressing it firmly into place. Keep each coat thin and let it cure fully before adding the next. You’re restoring a stable surface, so work carefully and check for flush edges.
Once the repair is firm, sand lightly to remove ridges and prepare the area for the next step.
Match Ceiling Texture
Recreate the ceiling’s texture so the repair blends with the surrounding surface. You’ll restore visual continuity and keep the room feeling complete.
First, inspect the original pattern: skip trowel, knockdown, orange peel, or popcorn. Then test on scrap drywall until your spray, roller, or knife motion matches the nearby finish. Finally, apply thin coats, feather the edges, and let each layer set before adjusting.
- Mask adjacent walls and fixtures.
- Prime the patched area for even absorption.
- Compare texture under side lighting, then touch up.
Work slowly; small adjustments matter. When you match the texture well, the repair disappears into the ceiling, and your space feels cared for, familiar, and ready again.
Restore Paint and Finish
Once the ceiling is fully dry and repaired, you can restore the paint and finish to match the surrounding surface. Start by cleaning dust, sanding the patch lightly, and wiping away residue.
Apply a stain-blocking primer over the repair and any discolored edges so moisture marks don’t bleed through. Let it cure fully, then use the same paint sheen and color as the rest of the ceiling.
Feather the paint outward with a roller or brush to blend the shift. If the ceiling has a flat, eggshell, or satin finish, keep your application consistent.
Apply thin coats, not heavy ones, and allow each coat to dry before the next. Check the area under natural light, then touch up as needed for a seamless result.
When to Call a Water Damage Pro for Ceiling Leaks
Call a water damage pro for ceiling leaks when the source is unclear, the ceiling shows sagging or widespread staining, or the damage keeps returning after cleanup. You need a pro when moisture may’ve spread above the visible area and you can’t verify structural safety. Their tools help you belong to a coordinated recovery plan, not a guesswork cycle.
Call immediately if drywall softens, bulges, or cracks.
Call if you detect mold odor, active drips, or electrical risk.
Call when water comes from plumbing, HVAC, or roof systems you can’t isolate.
A trained technician can map moisture, stop hidden spread, and confirm what needs removal, drying, and repair. That reduces repeat damage and protects your ceiling system.
Frequently Asked Questions
How Long Does Ceiling Water Damage Restoration Usually Take?
Usually, you’ll need a few days to several weeks, depending on drying, damage extent, and repairs. You should act quickly, monitor moisture, and coordinate with pros, so you can restore safety and comfort faster.
Does Insurance Cover Ceiling Leak Repairs?
Usually, yes, if a sudden leak caused the damage; your policy may cover repairs, drying, and replacement. You’ll verify exclusions, document everything, and file fast—otherwise a tiny drip can become a financial avalanche.
Can I Stay in the Room During Ceiling Drying?
You can stay in the room if the ceiling’s stable and drying equipment runs safely, but you shouldn’t sleep there. Keep airflow clear, monitor moisture, and leave immediately if you notice sagging, odors, or electrical concerns.
What Tools Are Needed for Ceiling Water Damage Cleanup?
You’ll need buckets, a utility knife, plastic sheeting, a ladder, a moisture meter, fans, a dehumidifier, gloves, goggles, and disinfectant. Like a surgeon’s kit, these tools let you work safely, dry thoroughly, and restore cleanly.
How Can I Prevent Future Ceiling Leaks?
You can prevent future ceiling leaks by inspecting roofs, flashing, gutters, and plumbing regularly, then sealing cracks, replacing worn materials, and fixing moisture sources promptly. You’ll protect your home and reduce costly damage later.
Recap
By stopping the source, spotting sagging, and speeding drying, you protect your ceiling from deeper decay. Remove damaged material, repair the surface, and restore paint with care to keep problems from spreading. If stains persist or mold returns, call a water damage pro before small seepage becomes serious structural stress. With steady steps and smart checks, you don’t just fix a leak—you fortify your home, preserving safety, strength, and peace.